


Migrating a WordPress website to AWS Lightsail involves a few steps. Lightsail simplifies the process of deploying and managing web applications, including WordPress. Below is a general guide for migrating a WordPress site to AWS Lightsail:
Prerequisites:
- AWS Account: You’ll need an active AWS account.
- Existing WordPress Site: The WordPress site you want to migrate.
- Access Credentials: Ensure you have administrative access to your WordPress site.
Steps to Migrate WordPress to AWS Lightsail:
1. Create an Instance in Lightsail:
Log in to AWS Lightsail: Log in to the AWS Management Console and navigate to Lightsail.
Create an Instance: Click on “Create instance” and choose the Linux/Unix platform. Select an instance plan based on your requirements.
Name your Instance: Give your instance a unique name for easy identification.
Launch Instance: Click on “Create Instance” to deploy your Lightsail instance.
2. Set up WordPress on Lightsail:
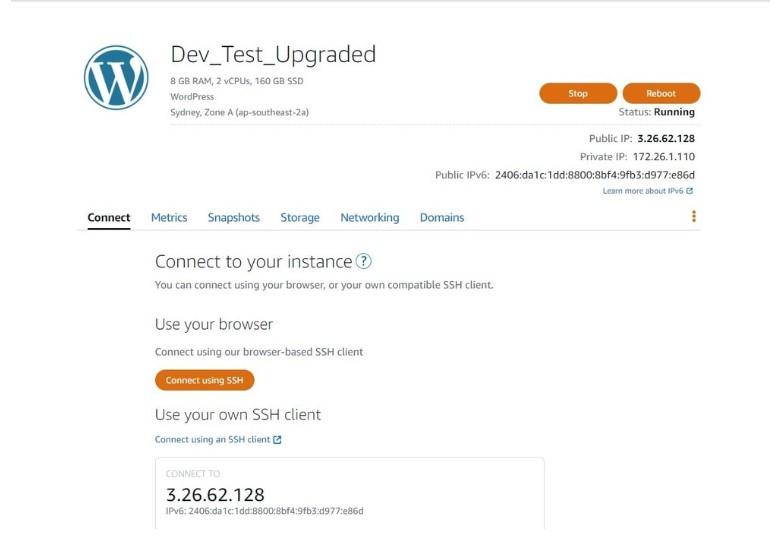
Connect to your Lightsail instance: Once your Lightsail instance is running, you can connect to it via SSH using the browser-based SSH terminal provided in the Lightsail console.
Install WordPress: Use commands (e.g.,
wget) to download and install WordPress. Follow the installation process detailed on the WordPress website.Configure your WordPress Installation: Adjust settings, set up databases, and configure your WordPress instance as needed.
3. Back up and Migrate your WordPress Content:
Back up your Current WordPress Site: In your existing WordPress site, use a plugin like “All-in-One WP Migration” or “Duplicator” to create a full backup of your WordPress site.
Download Backup: Download the backup file generated by the plugin to your local system.
Upload to Lightsail Instance: Using SSH or SFTP, upload the backup file to your Lightsail instance.
Restore the Backup on Lightsail: If using a plugin, follow the plugin’s instructions to restore the backup on your Lightsail WordPress instance.
4. DNS Configuration:
Point Domain to Lightsail Instance: In your DNS provider’s settings, configure the domain to point to the IP address of your Lightsail instance.
Update WordPress Settings: Log in to your WordPress dashboard on Lightsail, and update the WordPress Address (URL) and Site Address (URL) under Settings > General to match your domain.
5. SSL Certificate (Optional but recommended):
Set up SSL: Lightsail allows you to easily set up a free SSL certificate using Let’s Encrypt. This secures your site with HTTPS.
Install and Configure the SSL Certificate: Follow the instructions in the Lightsail console to enable and configure the SSL certificate for your domain.
After completing these steps, your WordPress site should be successfully migrated to AWS Lightsail. Ensure that everything is working as expected by browsing your domain and testing the functionality of the website.