

There are 7 steps to set up CloudFront.
- Create cache policy
- Create Origin Request
- Issue SSL Certificate
- Create Distribution
- Edit Distribution
- Change DNS
- Use WordPress cache plugin
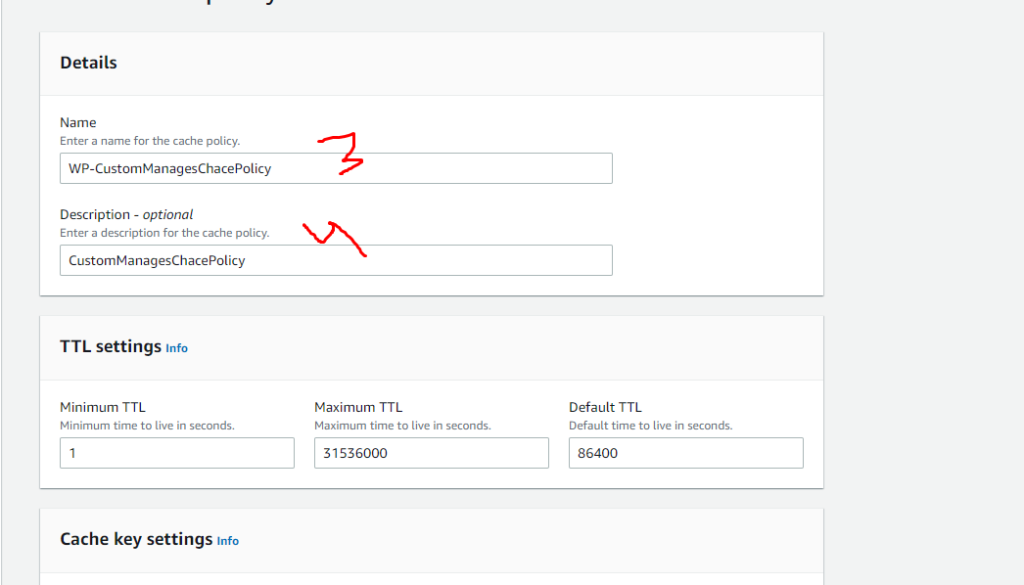
Create cache Policy:
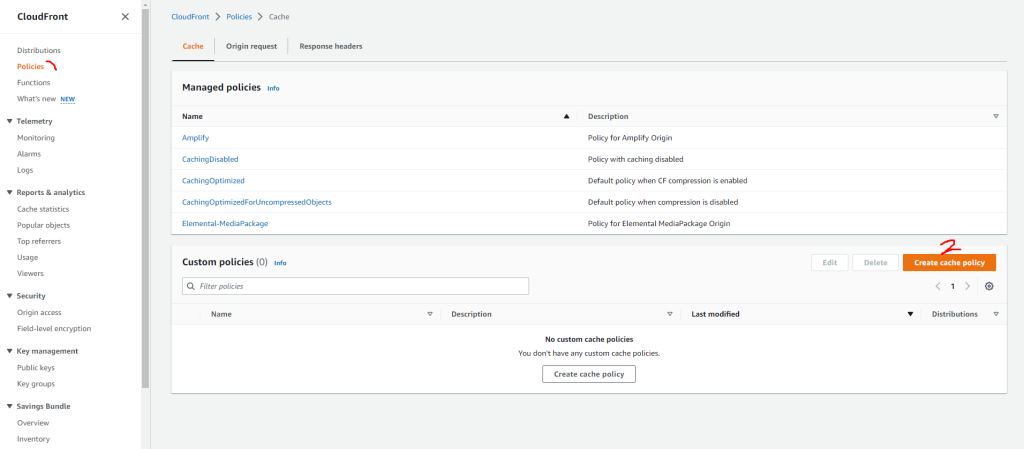
Enter name and description. click on the check box of the header and add host, origin and referer under the header. Query setings and cookies will be all

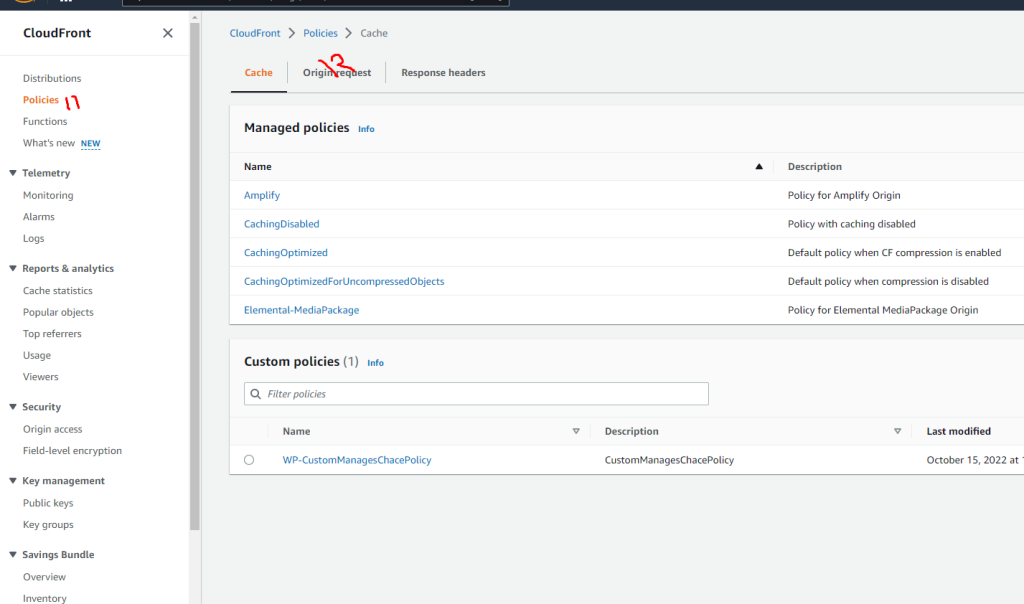
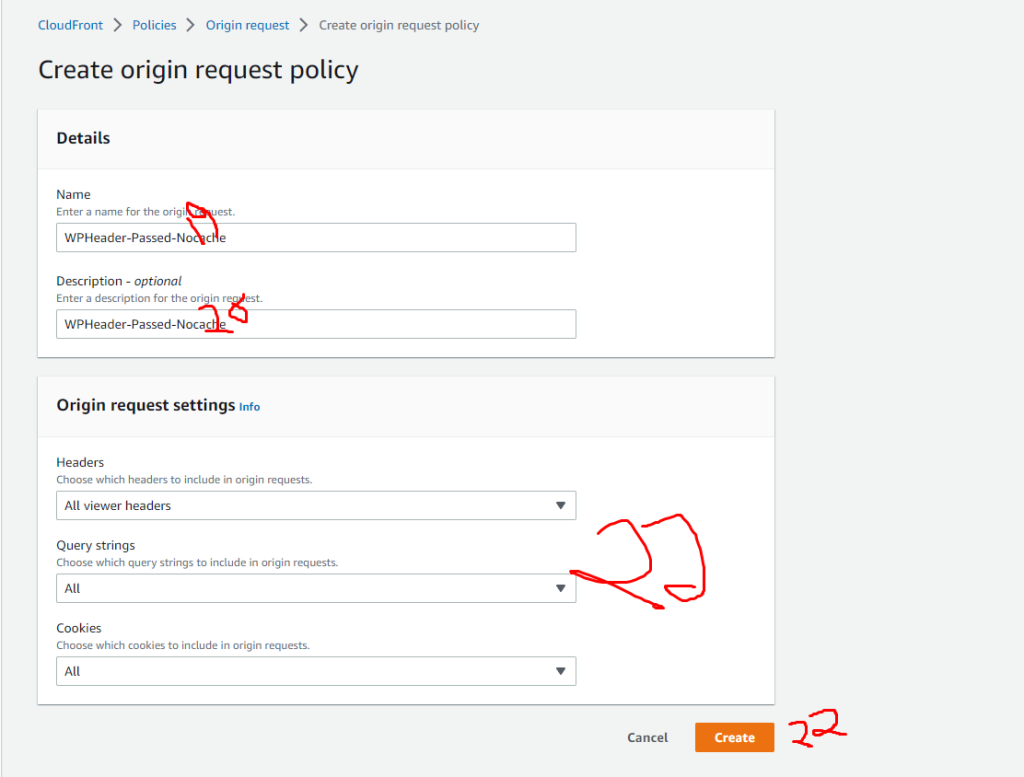
Create Origin Request Policy
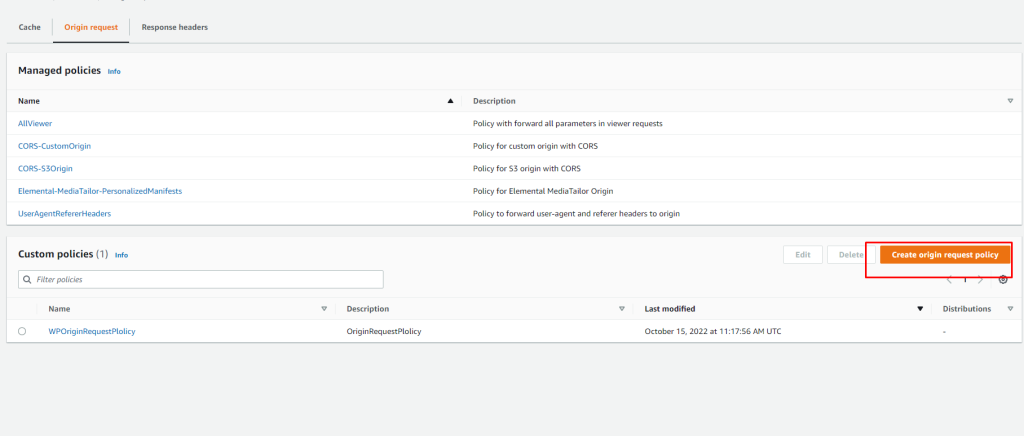
Again go to the Policies option and click on the origin request tab. After entering the origin request tab, you will get create request policy button. click on the button.
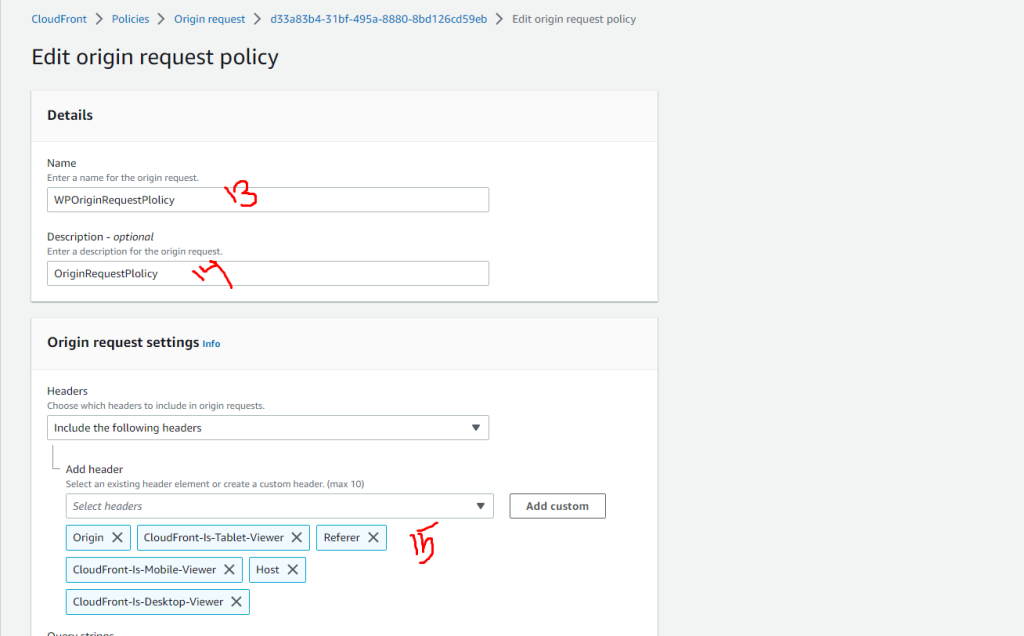
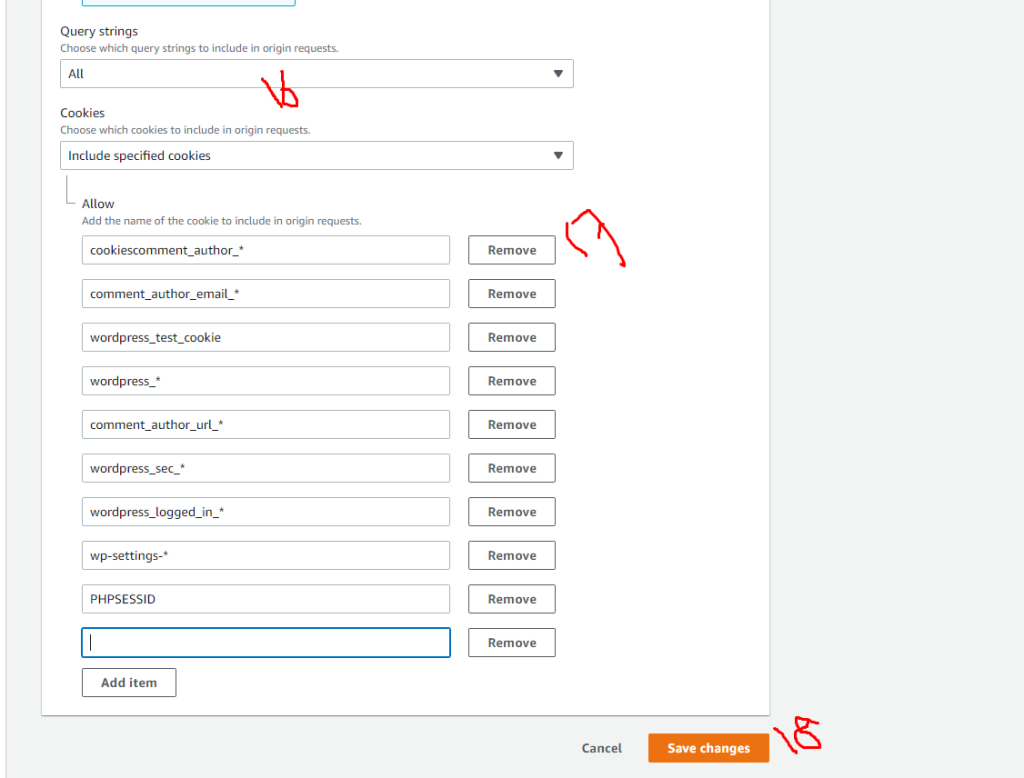
Add include specified cookies field
cookiescomment_author_*
comment_author_email_*
comment_author_url_*
wordpress_logged_in_*
wordpress_test_cookie
wp-settings-*
PHPSESSID
wordpress_*
wordpress_sec_*
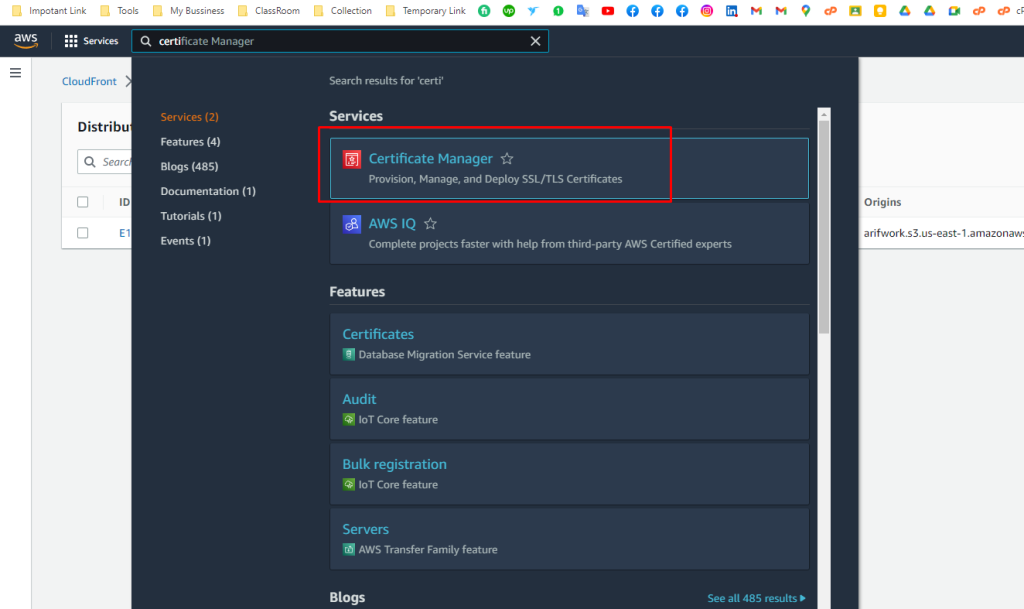
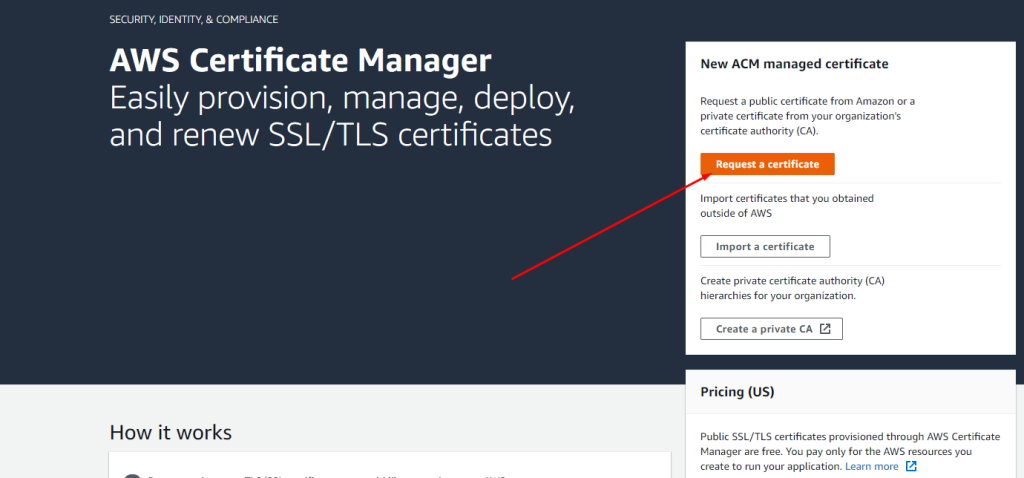
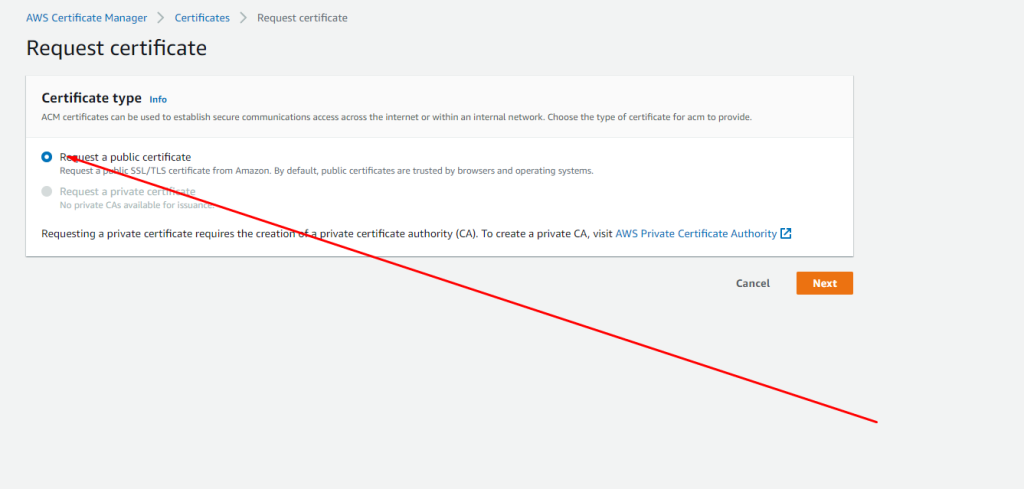
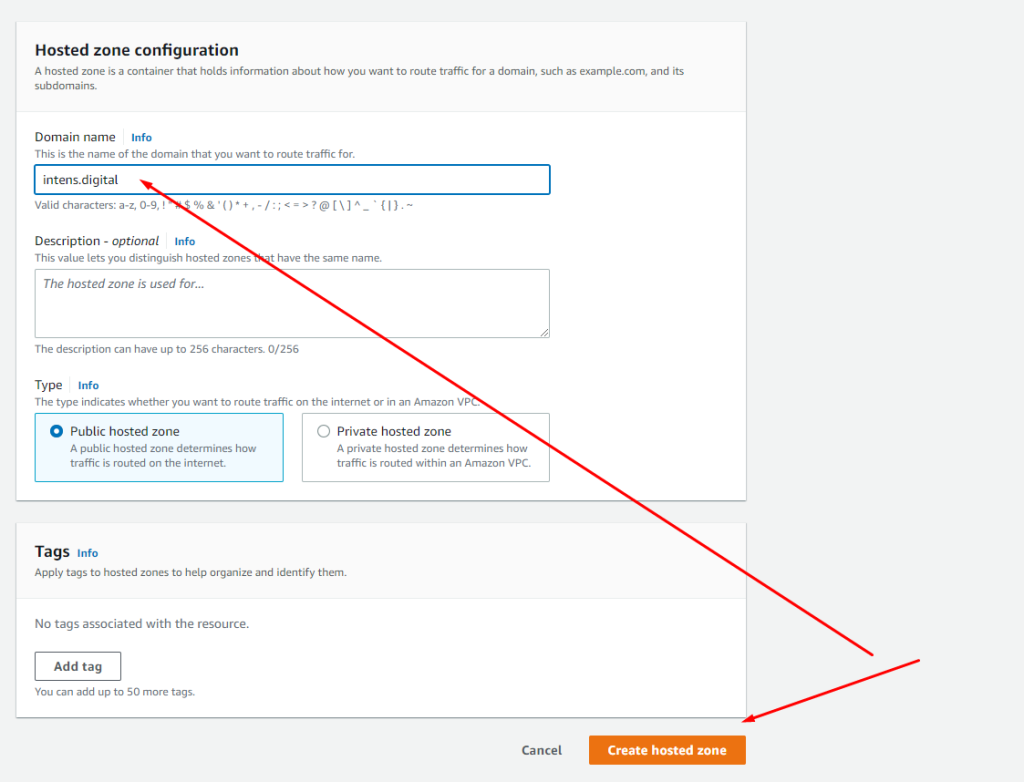
Issue ssl Certificate
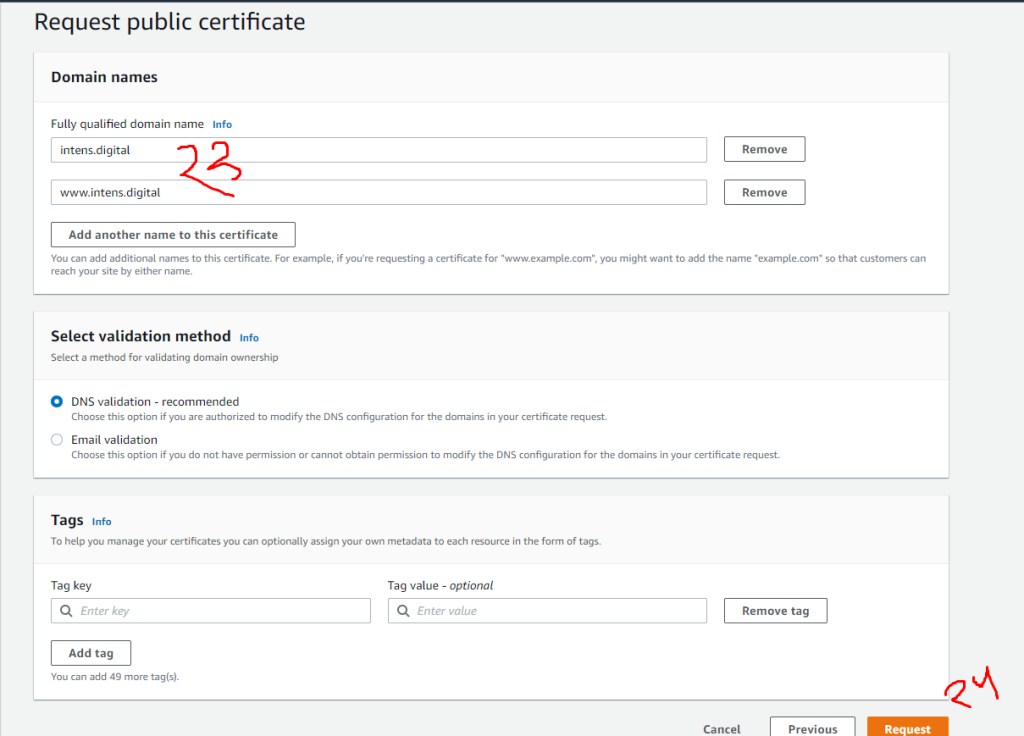
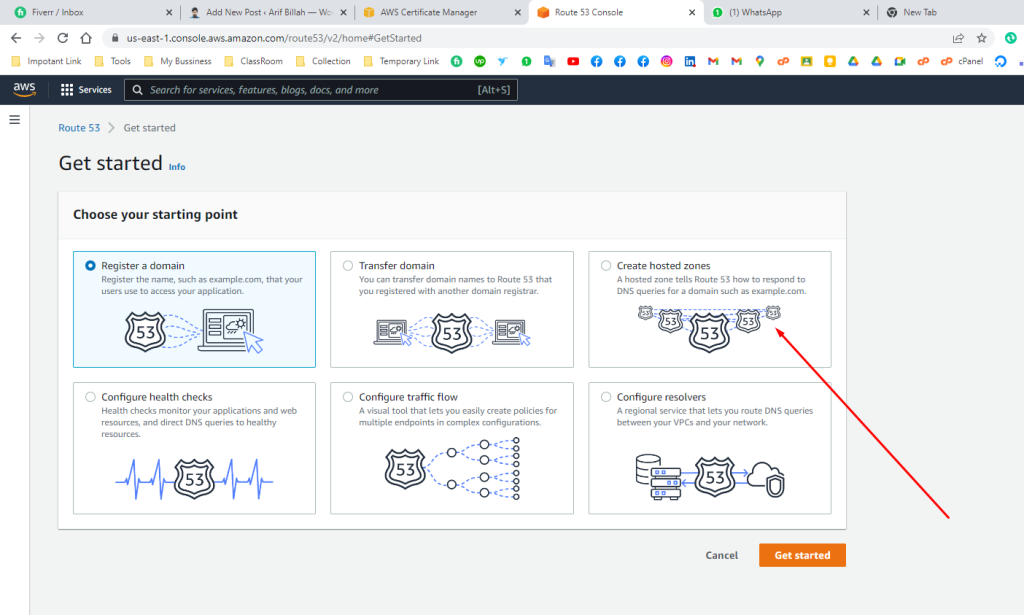
Go to the Route 53 and add a domain
Again go back certificate manager and click mentioned button
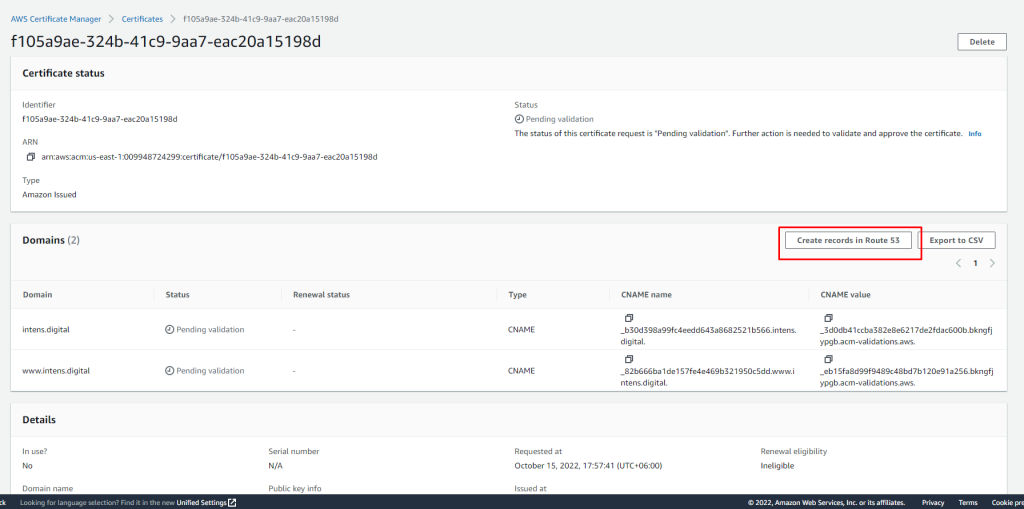
wait for something like 50 minutes to issue the certificate. it is now pending.
Create Distribution
go the cloud font. and click on the create distribution button

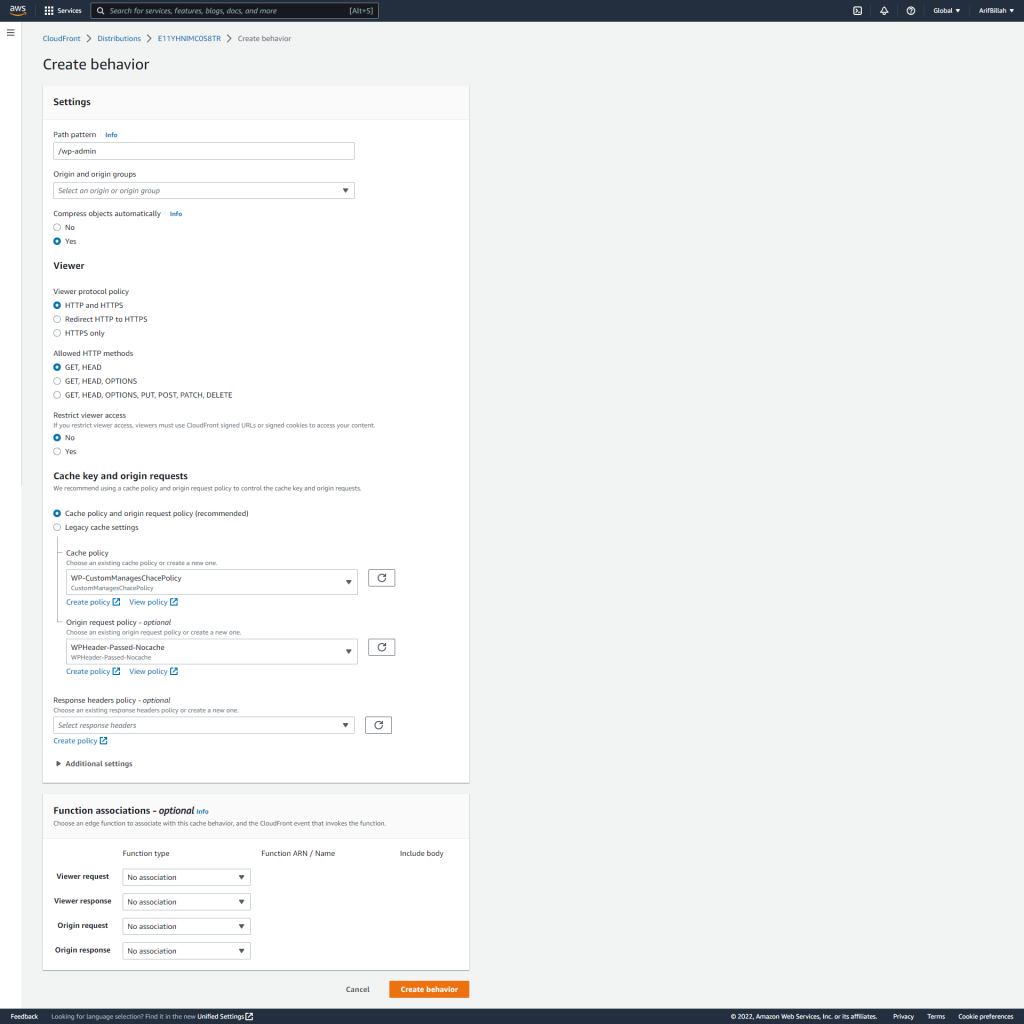
Edit Distributions Behaviour
back again on the coludfont. enter cloud font and click on Behaviours. Now follow my steps
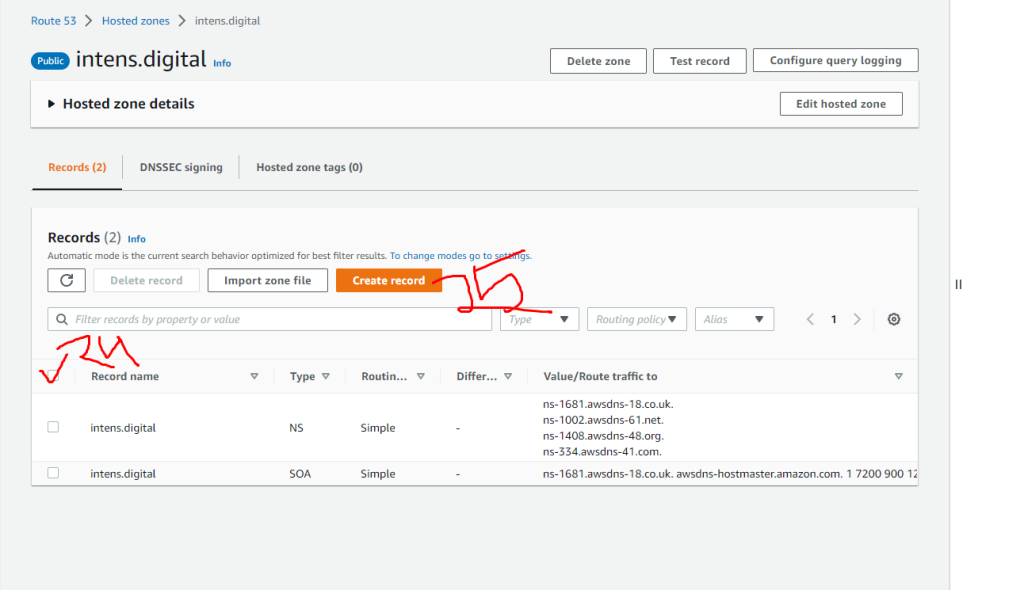
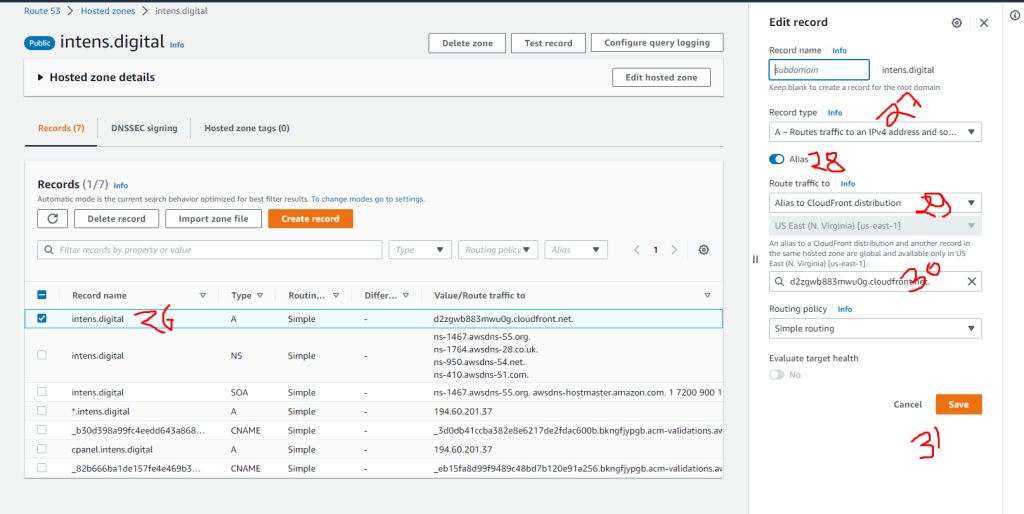
DNS management
Go to the route 53 console and enter the domain dns zone. After the select A record follow my screenhooted option
Congratulations! you successfully setup CloudFront on your website.
You can check using cmd.
$curl -v intense.digital
after run this command your will get details. Also you can check it using who.is.
Best of luck
if you faced any issue. contact me.