What I Do
UX Consulting
A UX consultant is responsible for many of the same tasks as a UX designer, but they typically.
App Development
We’ll handle everything from to app development process until it is time to make your project live.
Business Stratagy
We’ll help you optimize your business processes to maximize profitability and eliminate unnecessary costs.
My Portfolio


All Web Development Projects
My Resume
Education Quality
B.Sc Computer Science & Engineering
Green University of BangladeshB.Sc in Computer Science & Engineering focuses on programming, algorithms, software development, computer systems, and network technologies.
HSC
Tikikata Nuria Senior College (2018-2019)Associate of Science provides foundational knowledge in science and mathematics, preparing students for further education or technical careers.
SSC
Mathbaria Momenia (2016-2017)Secondary education or post-primary education covers two phases on the International Standard Classification of Education scale.
Web Dev
HTML
CSS
Bootstrap
JS
c
SEO
WordPress
Elementor
Linux System Admin
Linux
Networking
Apache/Nginx
DNS
CDN
AWS
Firewall
Support & IT
Job Experience
Website Developer
Level 2 Seller at Fiverr
System Administrator
Level 2 Seller at Fiverr
Senior Linux SysAdmin
Hostorio.com - A Web Hosting Company
Cloud Engineer
Softorio.com - A digital agency
EC2, VPC, Route 53, Lightsail etc
Rising Talent on the Up-work
Formar Junior IT support Eng
ProHost - Saudi Arabia Hosting Company
Most Repeated Work
- WordPress Website Development Services
- Multi-Vendor eCommerce Website
- SEO & Speed optimization
- Web server configuration
- Web Server configuration
- DNS managments
- CDN & IP managments
- AWS EC2 & Lightsail Configuration
- Web Panel Install
- Cloudpanel, Cyberpanel and Cpanel conf
- SSL and Security
- Support & IT
Awesome Clients
My Pricing
Make Your Single Page
Elementor / WPBakeryAll the Lorem Ipsum generators on the Internet tend to repeat predefined chunks as necessary
1 Page with Elementor
Design Customization
Responsive Design
Content Upload
Design Customization
2 Plugins/Extensions
Multipage Elementor
Design Figma
MAintaine Design
Content Upload
Design With XD
8 Plugins/Extensions
Design Make this Page
Elementor / WPBakeryAll the Lorem Ipsum generators on the Internet tend to repeat predefined chunks as necessary
5 Page with Elementor
Design Customization
Responsive Design
Content Upload
Design Customization
5 Plugins/Extensions
Multipage Elementor
Design Figma
MAintaine Design
Content Upload
Design With XD
50 Plugins/Extensions
Customize Your Single Page
Elementor / WPBakeryAll the Lorem Ipsum generators on the Internet tend to repeat predefined chunks as necessary
10 Page with Elementor
Design Customization
Responsive Design
Content Upload
Design Customization
20 Plugins/Extensions
Multipage Elementor
Design Figma
MAintaine Design
Content Upload
Design With XD
100 Plugins/Extensions
My Blog
How to install cyber panel using command line
Installing CyberPanel
Step 1: Connect to your server via SSH
The installation of CyberPanel is quite simple. First, log into your server via SSH as the root user (sudo will not work). You can get the login details from your web host.
Step 2: Update packages
For Ubuntu: sudo apt update && sudo apt upgrade -y
For CentOS/Alma/Rocky:
sudo yum check-update
sudo yum update
Step 2: Run the installation script
Run the following command. It will initiate the automated installation script, which will prompt you for a few decisions about which version of LiteSpeed and which add-ons you would like to install.
sh <(curl https://cyberpanel.net/install.sh || wget -O - https://cyberpanel.net/install.sh)
If, for some reason, you are not able to log in as root, you can use this command
sudo su - -c "sh <(curl https://cyberpanel.net/install.sh || wget -O - https://cyberpanel.net/install.sh)"
Step 3: Select the version of LiteSpeed that you would like to use
Select which version of LiteSpeed to install. If you select LiteSpeed Enterprise, please ensure that you have obtained a license key first. It is free for 1 domain, but you still need to obtain the key. Visit the pricing table 346 to decide your desired plan.
CyberPanel Installer v2.1.2
RAM check : 184/981MB (18.76%)
Disk check : 7/30GB (27%) (Minimal 10GB free space)
- Install CyberPanel with OpenLiteSpeed.
- Install Cyberpanel with LiteSpeed Enterprise.
- Exit. Please enter the number[1-3]:
If you selected LiteSpeed Enterprise, you will see the following prompt. Enter your serial number
If you do not have any license, you can also use trial license (if server has not used trial license before), type TRIAL
Please input your serial number for LiteSpeed WebServer Enterprise:
Step 4: Select options and add-ons
You will be presented with a series of prompts for different options and add-ons that are available.
you just type Y every time.
Full Service (default Y):
Allow for your Database to be installed on a remote server
CyberPanel Version (default Latest Version):
You can choose to install a previous version of CyberPanel, or press Enter to install the latest
Password (default “1234567”):
It is recommended that you use “s” to set your own strong password
Memcached 22 (default Y):
Distributed memory object caching system
Redis 8 (default Y):
In-memory data structure store, used as a database, cache, and message broke
Watchdog 17 (default Yes):
Kernel watchdog is used to monitor if a system is running. It is supposed to automatically reboot hanged systems due to unrecoverable software errors
Step 5: Installation
The installation process will proceed automatically. It will take 5-10 minutes, depending on the speed of your server.
Step 6: Finalize Installation
At the end of the installation process, you will be presented with the following screen which contains important information about your configuation. Select and copy it to a safe location for future reference.
#
            CyberPanel Successfully Installed

            Current Disk usage : 7/30GB (26%)

            Current RAM  usage : 313/981MB (31.91%)

            Installation time  : 0 hrs 11 min 0 sec

            Visit: https://<your server's IP address>:8090
            Panel username: admin
            Panel password: <the password you set during installation>
            Visit: <your server's IP address>:7080
            WebAdmin console username: admin
            WebAdmin console password: TSXMwny4zVeDg37K

            Visit: https://<your server's IP address>:8090/rainloop/?admin
            Rainloop Admin username: admin
            Rainloop Admin password: gQKFWm9O3nr7Xn

         Run cyberpanel help to get FAQ info
         Run cyberpanel upgrade to upgrade it to latest version.
         Run cyberpanel utility to access some handy tools .

          Website : https://www.cyberpanel.net
          Forums  : https://forums.cyberpanel.net
          Wikipage: https://docs.cyberpanel.net
          Docs    : https://cyberpanel.net/docs/

        Enjoy your accelerated Internet by
            CyberPanel & OpenLiteSpeed
#
If your provider has a network-level firewall
Please make sure you have opened following port for both in/out:
TCP: 8090 for CyberPanel
TCP: 80, TCP: 443 and UDP: 443 for webserver
TCP: 21 and TCP: 40110-40210 for FTP
TCP: 25, TCP: 587, TCP: 465, TCP: 110, TCP: 143 and TCP: 993 for mail service
TCP: 53 and UDP: 53 for DNS service
Your provider seems blocked port 25 , E-mail sending may not work properly.
Step 7: Restart Server
Would you like to restart your server now? [y/N]:
Enter “y” to restart. Or enter “reboot” later after you have performed other desired operations.
Step 8: Access CyberPanel
After the successful installation you can access CyberPanel using the details below (make sure to change):
URL: https://:8090
Username: admin
Password:
Congratulations! you successfully install cyber panel on your server

How to connect s3 bucket to wordpress using wp offload media lite plugin
An Amazon S3 bucket is a public cloud storage resource available in (AWS). s3 a object storage offering. Amazon S3 buckets, which are similar to file folders, store media, which consists of data and its descriptive metadata.
Let’s started
Go to the AWS control panel and then the s3 bucket.
create an s3 bucket same as my screenshot.

Enter the bucket and click on the permission tab. then you have to off block all public access.

then we would have to add a bucket policy.
{
    "Version": "2008-10-17",
    "Statement": [
        {
            "Sid": "AllowPublicRead",
            "Effect": "Allow",
            "Principal": {
                "AWS": "*"
            },
            "Action": "s3:GetObject",
            "Resource": "arn:aws:s3:::arifwork/*"      //replace your bucket name
        }
    ]
}

then go to the IAM. we have to create a user. so click on the ‘User” and enter a user name.

then click on the attached existing policies directly then you will get create policy button. click on the create policy button


{
	"Version": "2012-10-17",
	"Statement": [
	{
		"Effect": "Allow",
		"Action": [
			"s3:CreateBucket",
			"s3:DeleteObject",
			"s3:Put*",
			"s3:Get*",
			"s3:List*"
		],
		"Resource": [
			"arn:aws:s3:::bucketname",
			"arn:aws:s3:::bucketname/*"     //replace your bucket name
		]
	}
	]
}


In the end, you have to add the plugin. the name of the plugin is “wp offload media lite” after active the plugin and enter the plugin settings. you will get a code like
define( 'AS3CF_SETTINGS', serialize( array(
	'provider' => 'aws',
	'access-key-id' => '********************',
	'secret-access-key' => '**************************************',
) ) );
you paste the code on your wp-config.php file. then paste the access key and secret id on the code.
How to Install Apache
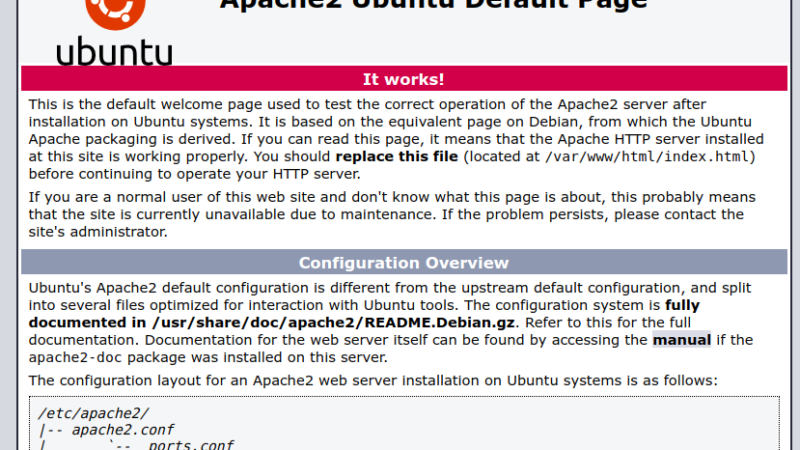
How to Install Apache
- Install Apache
sudo apt update && sudo apt upgrade -y
sudo apt install apache2 -y - Install PHP
cd /var/www/html - HTTPS
sudo apt install python3-certbot-apache -y
sudo certbot –apache -d -d www.domain
sudo certbot –apache -d huskyfurniture.com -d www.huskyfurniture.com
Contact With Me

Nevine Acotanza
Chief Operating OfficerI am available for freelance work. Connect with me via and call in to my account.
Phone: +01234567890 Email: [email protected]


